For IT administrators
Mailtastic Outlook Add-in is a web component used to set default Mailtastic signatures for our customers' employees on the Outlook for the Web platform.
The add-in works in a similar way as the EasySync for the Outlook for Desktop; it authenticates the user, retrieves her signatures from the Mailtastic backend, and "injects" default signature in the email message body.
The add-in has to be installed and configured by the customer's Microsoft 365 System Administrators.
Note:
If you want to share the add-in on the desktop, you still need to enable this in your Mailtastic account under "Integrations-Install Signatures-Outlook Add-In".
This chapter describes the steps to follow to deploy the Mailtastic Outlook add-in to customer employees who use Outlook for the Web.
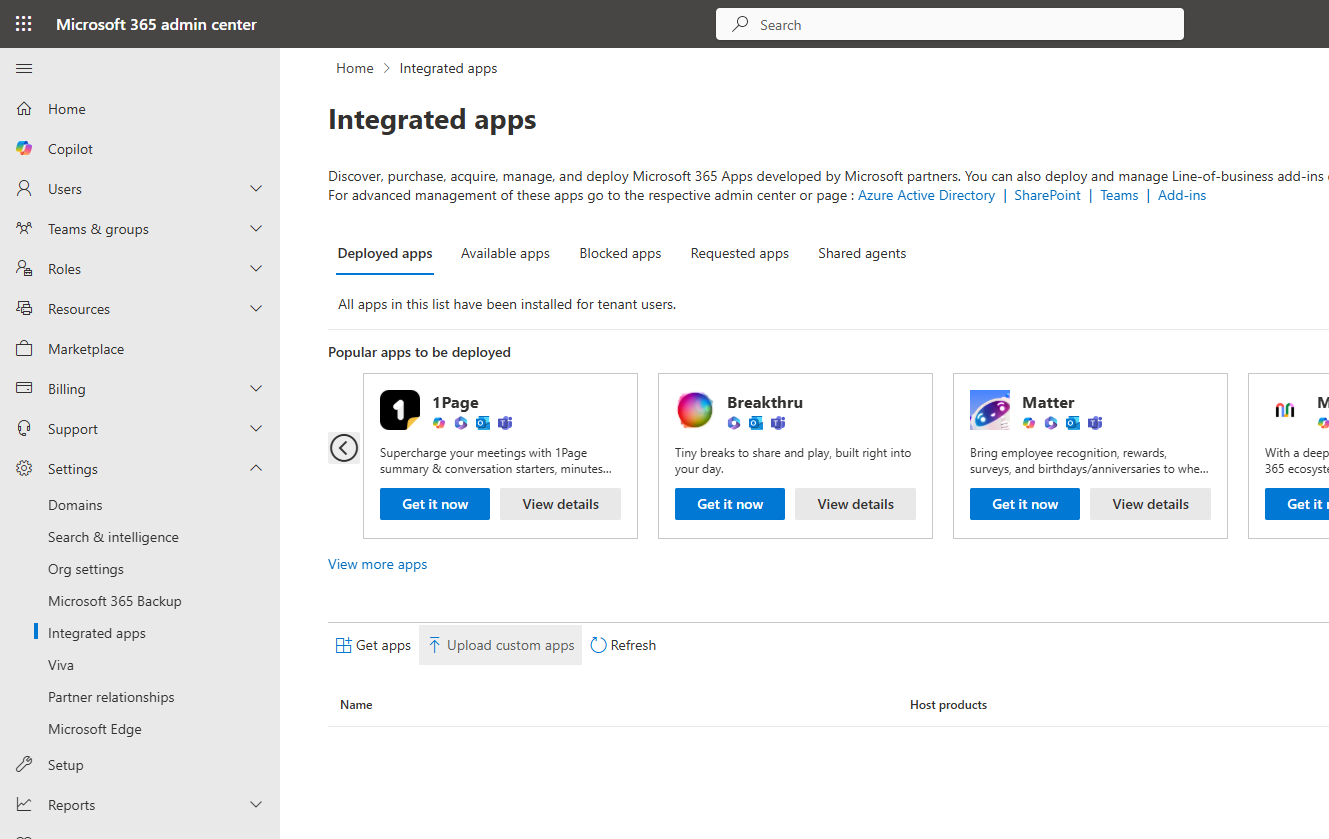
Log to Microsoft 365 Admin Center (https://admin.microsoft.com/AdminPortal)
Go to the “Integrated apps” section (Click Show all > Settings > Integrated apps) and click the “Upload custom apps” button:
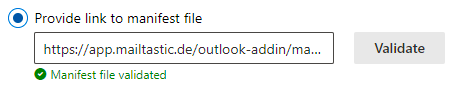
“Deploy New App” wizard will open. On the first step configure select “Provide link to manifest file” and paste the following URL:
https://app.mailtastic.com/outlook-addin-ms-store/manifest.mailtastic.xml
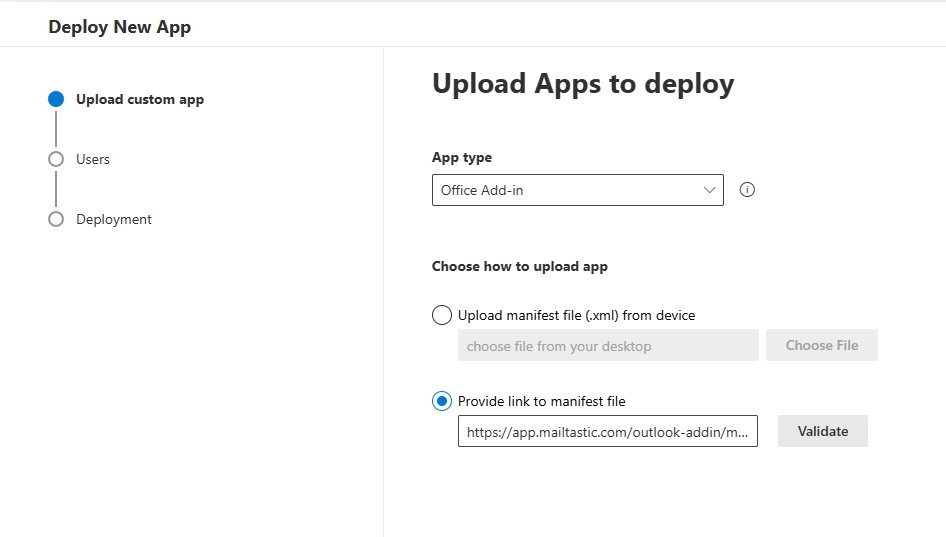
Click the “Validate” button and wait until the manifest file is validated:
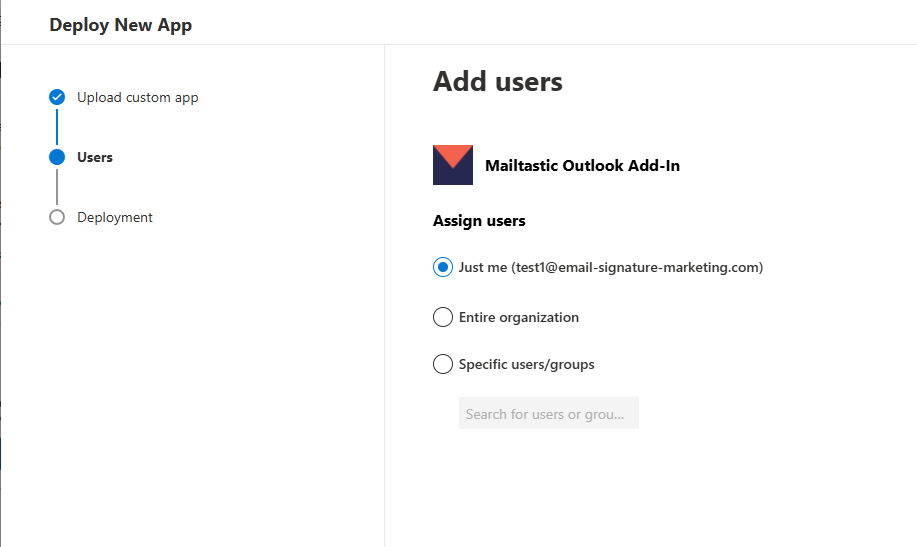
Click “Next” to proceed to the next step where you have to set up target users for Mailtastic Outlook Add-in. Here you can select several options, which you can later change.
If you want to test add-in just for you or a smaller group of users, use the first or third option. Later you can deploy the add-in to the whole organisation if you want.
Here you can also set if the add-in is in test deployment, however it does not change the behaviour of the add-in; it is just information of your current add-in deployment status.
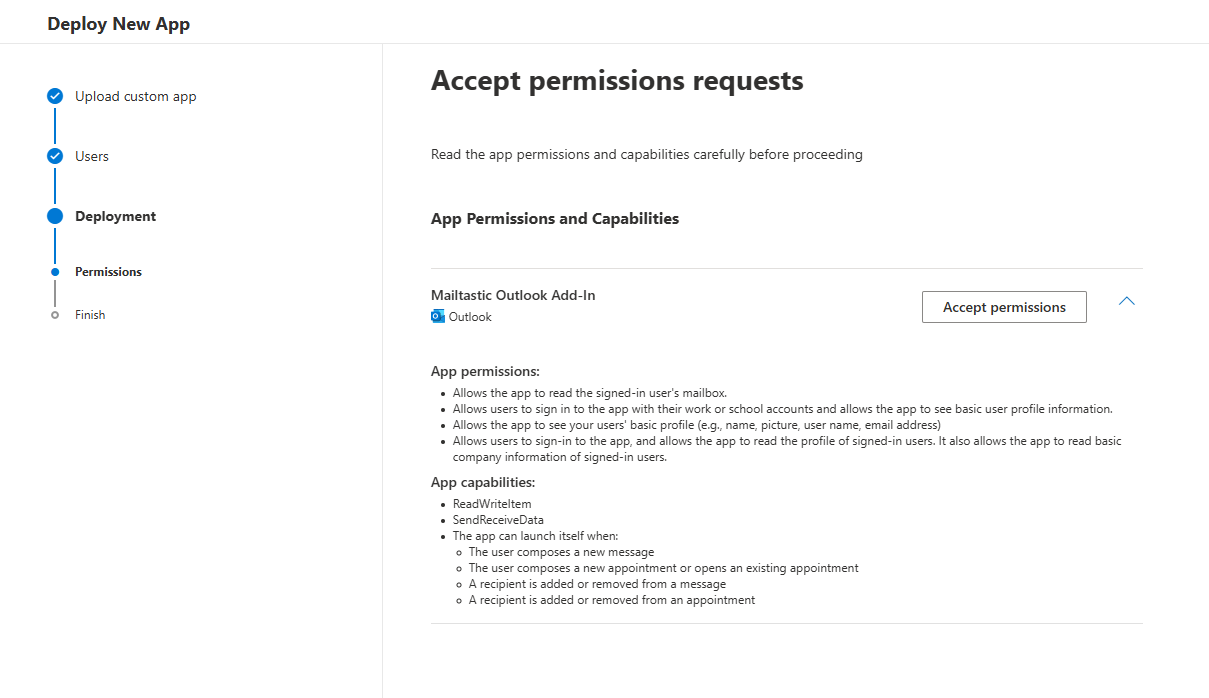
In the next step you have to accept “Permissions” for the add-in, so click the “Accept permissions” button:
A login dialog will be opened and you will be prompted to accept permissions one more time:
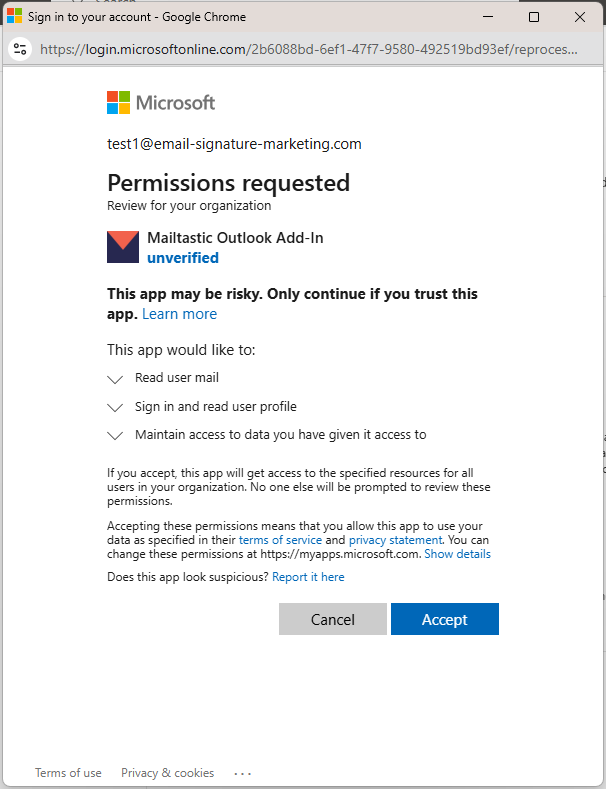
Note that dialog shows that the app is “unverified”. We are currently in the process of add-in verification from Microsoft’s side, and we expect to get a “verified” badge in May 2025.
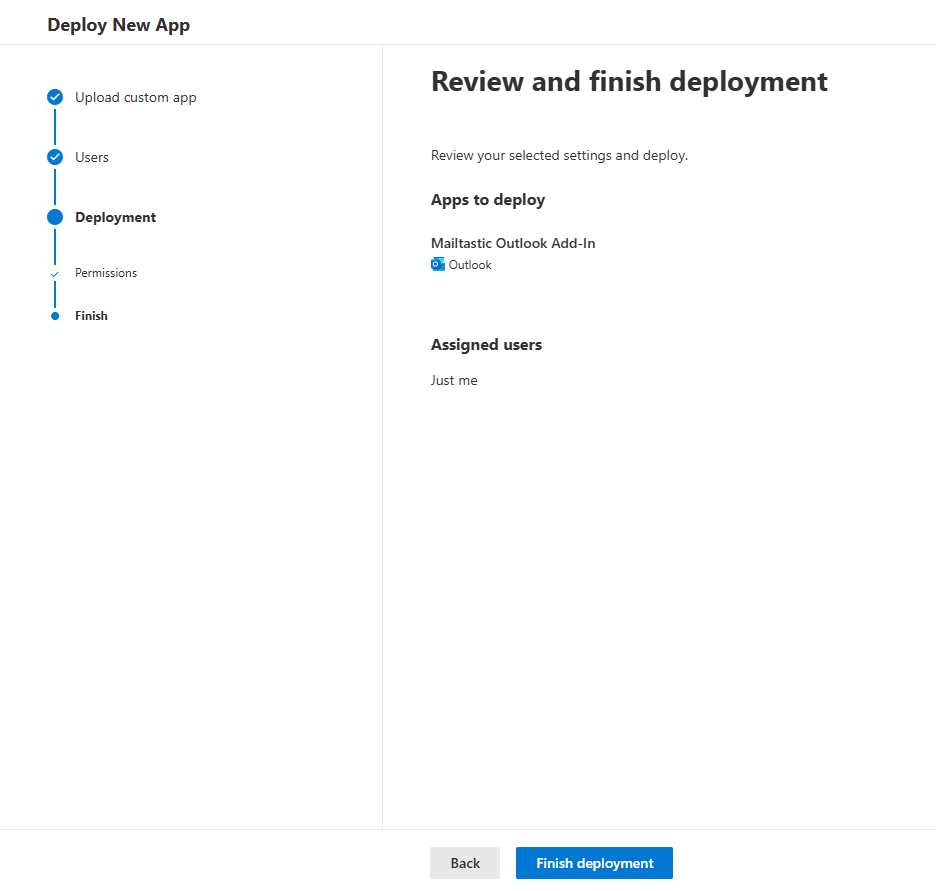
Click “Next” to proceed to the latest step. Review this step and click the “Finish deployment” button:
Wait a few seconds until the add-in is deployed. The following page will be displayed:
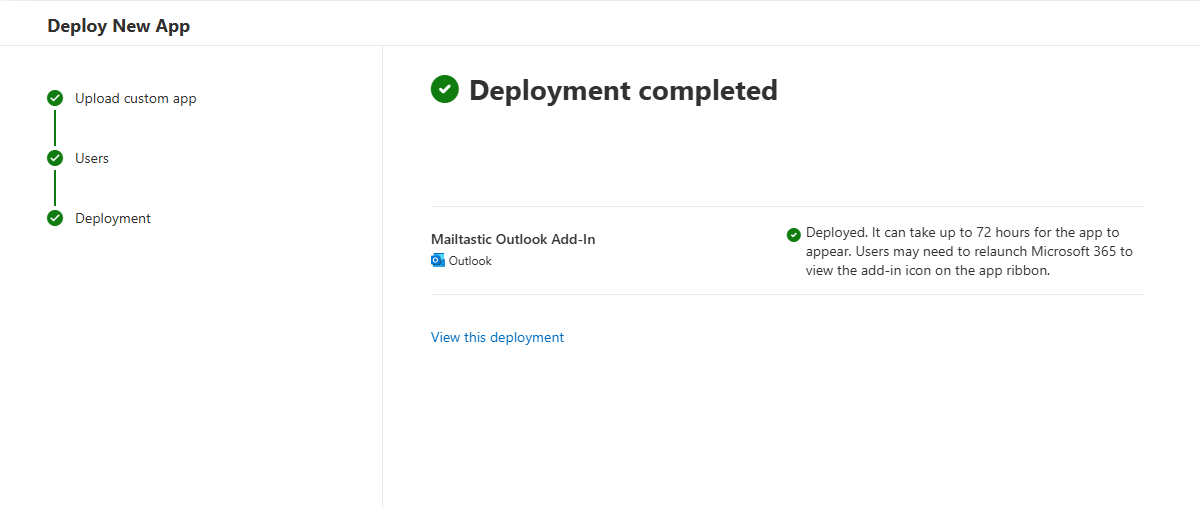
It usually takes a few hours until the add-in is propagated to targeted employees.
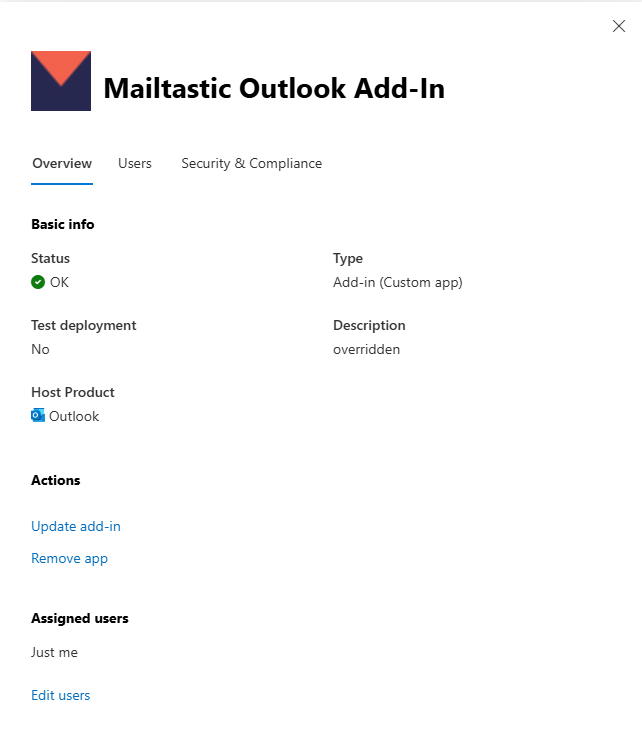
Go back to “Integrated apps”. Add-in will now be listed:

From here you can additionally update the users, manifest file or delete the add-in.
Also, additional settings can be changed if you click the “Add-ins” link at the top of the page:
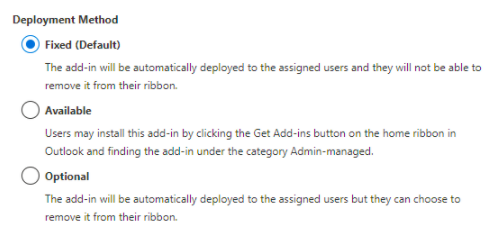
Here you can change the behaviour of the add-in for end-users, and allow them to manually disable or remove the add-in from their list of available add-ins. The “Fixed” method is the default one, which does not allow end-users to disable the add-in.
Note: If you want to share the add-in on the desktop, you still need to activate this in your Mailtastic account under "Integrations".
-
Do you still have questions?
No problem - we will be happy to help you personally! Simply use our free live chat (below right).